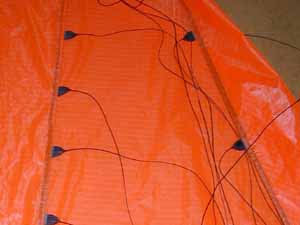
Step #9
The Bridle
Patience, accuracy and consistancy are key here. It's OK to be off by a few mm's but all of the lines should be off by the same amount.
The basic tools are:
- A ruler
- A lighter
- A hotcutting tool (optional)
- An end clamp fixture
- 4 small metal rings
- Two 15" 2mm line
After cutting each end, melt it with the lighter (just a bit), then tamp the molten end against the lighter to form a small mushroom. This keeps the slipknot from pulling through.

a) End clamping fixture. After melting
a mushroom on the end of the Dacron, place it in the sheet metal wedge.

b) My racking device - a piece of wood with numbered nails. Do all the cutting at once, then all the tying.

c) This is the basic knot for the entire
bridle - the slip knot. Tighten it down
trying to get the mushroom close to the end, then slide it tight.

d) Tie all the lines onto the kite first.

e) Starting at the top, tie two A lines,
then a B line, then two A's, then a B, (etc.) into the rings. A11 &12 and B5 & 6 go to a seperate ring to form the brakes.

f) Once they are all tied up, tie the rings together with the 2mm line, measure the middle, then tie an over-hand knot in the center. This is what you will girth hitch the control lines to.

g) To avoid twisting, clip the lines to the top when you aren't using the kite.

h) Make a bag. Go try it out.