Adding a Tip Hole to Your Skis
Step 1 – Void your manufacturer’s warranty.
Step 2 – Be brave. Don’t fear the drill.
There are a lot of advantages to having a tip hole in your touring skis, and while not every manufacturer adds one, they are easy to retrofit. Tip holes are traditionally thought of as haul points for emergency sleds, but I also like them for tent spreader tie-off points, hauling points or any sort of tip attachment point you can think of. Without them, it’s kind of like tying a string to the snout of a trout. Good luck. Most recently, I lost a skin and needed a tip hole to rig an emergency traction device to, and in this case, a tip hole was essential.
Off the record, almost all of the manufacturers I have talked to have said that drilling a tip hole will not compromise the integrity of the ski. One even compared it to drilling a hole in a snowshoer’s head – “You won’t hit any vital organs.” If you are worried about the structural integrity of a large hole, you could even drill a tiny 1/8″ hole, pass a tie-off cord through that, and in turn that could be clipped off to for bigger jobs. Most of the tip of a ski is filler, but that said, drilling a hole and complaining about subsequent delaminating will probably be met with a scowl by any Returns Department.
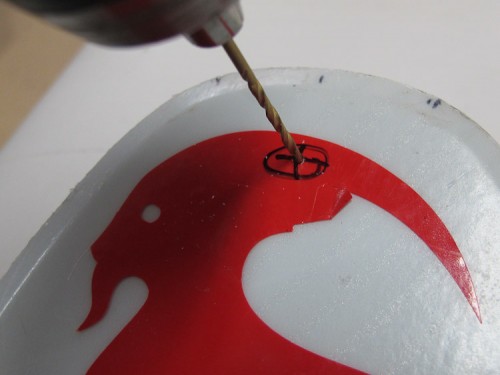
Step One – locate the approximate position and drill at small pilot hole. If you are really worried about strength, this 1/8″ hole can be the final hole. If you need to rig a sled, you can pass a small cord through it, create a loop, and then clip off to that.
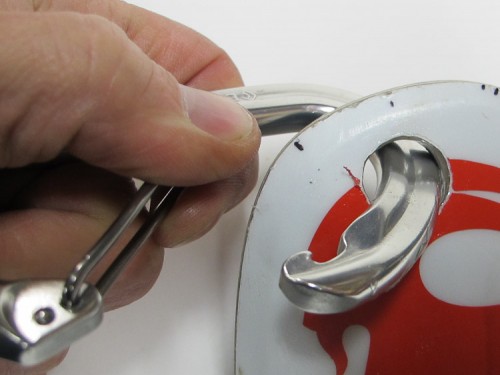
Step Two – I’m a lazy mofo, so I like a hole big enough to pass a carabiner through, which means about 5/8ths of an inch.
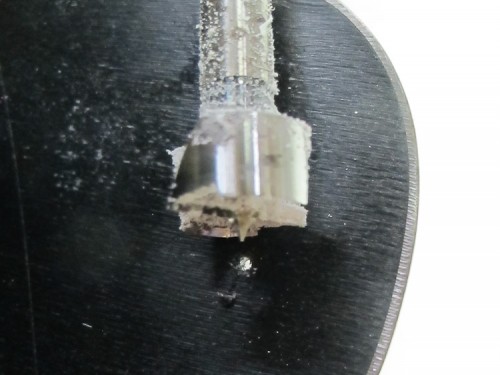
After you have the pilot hole drilled, use it to center your main drill. I like using a Forstner bit as they create a very clean hole. Drill the first part about halfway through, then turn the ski over and drill again from the other side. Twist bits will suffice, but require more touch-up work afterwards.
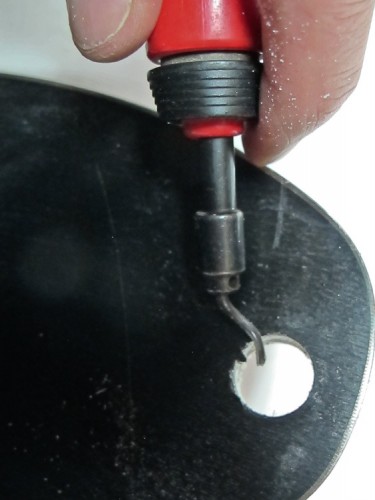
After the deed is done, deburr the edges.
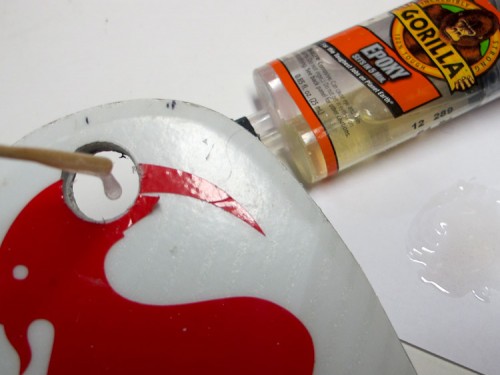
To keep the core from getting saturated, coat the inside with epoxy.
Congratulations – you now own your skis completely and will not be able to return them for any reason whatsoever. :) But, you have a more useful backcountry tool.
________________________________
Help support StraightChuter.com and be prepared for an emergency with an Adventure Medical SOL Emergency Blanket from Backcountry.com. Click on the photo below…
Category: 02 Gear



Did that earlier this season and while I haven’t had to use the holes yet I do get endless enjoyment out of watching snow come through the holes while I’m meadowskipping at low speeds.
When I’m hiking and bushwhacking into or out of an objective, I like to clip my skis to the back of my pack and drag them behind.
After a pilot hole, I use a step bit from both sides, drilling down to the size I need, and slightly beveling the rim with a countersink bit. I like a hole in un-notched ski tails for certain types of skin attachments. I reinforce those with a grommet & epoxy.
Where do I find this grommet and what kind of epoxy? Merci!!
Hi Katrina – I just drilled a hole (no grommet) and used generic quick-set two-part epoxy.
Is there any issue drilling through a carbon layer? I have done this on old fiberglass skis but I really do not know much about carbon. I would like to get a pair of new lightweight carbon skis, but I would hate to damage them if the carbon is different than fiberglass.
Hi Mike – supposedly drilling through tips is not an issue with any skis (carbon or not) and the main reason companies don’t do it is expense.