A plan of action – Part II
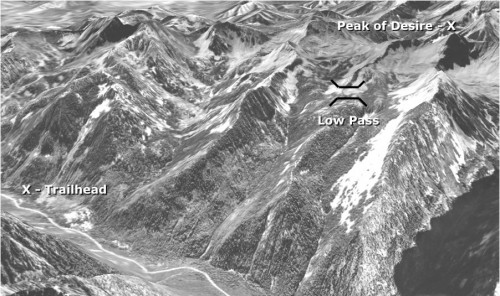
To layout a tour, begin with the basics–where you are starting from and where you want to go. Next, mark out any passes that lay between these two points.

The first steps to laying out a day tour begin with a trailhead, an objective and any low or safe spots in between.
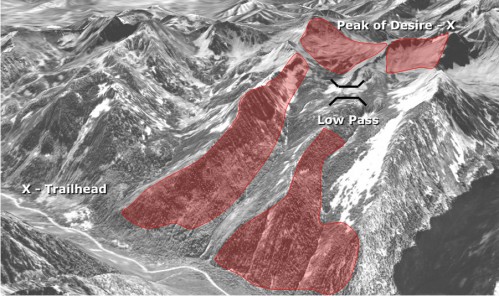
Next, identify (and avoid) any steep avalanche terrain. Going up is a slow process and it is important to minimize your time in the “strike zone.”

Identify steep avalanche terrain… and avoid it whenever possible.
Third, look for low, safe ground leading up to your high point.

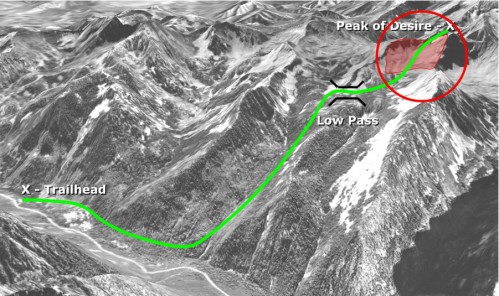
Once the basics passes, dangerous spots and low angle terrain has been indentified, layout a route.
Forth, identify any areas where steep, exposed terrain is unavoidable and correlate these areas with your avalanche observations. If the snow seems unstable, find a safer route up the Peak du Jour, or modify your plans.

Identify trouble spots – almost every tour has a few of them and they are where almost all accident happen.
Once you have marked out these options, creating a day tour is a matter of connecting the dots between trailheads, valleys, passes and summits. This is a simplified version of the process, but it is a start. From here, you need to “fact check” your route to see if the terrain you’ve chosen is skiable, or a huge cliff. This is done by measuring the contour lines, or looking at photos. Postcards are often some of the best aerial photos available and not only that, they are cheap, travel well and you can mail them when you are done.
______________________
Click the image below for 15% off on a Mountainsmith Flash Camera bag from Backcountry.com, which is perfect for keeping your camera handy for future reference photos.
Category: 10 Navigation


