
Basic Workbench Design & Plans
This is a cheap & easy variation on a Fine Woodworking design and favors two of my favorite tools – a chop box and a cordless driver. It’s all about 90 degree cuts, shooting screws and avoiding notching as much as possible. The materials for this bench came to about $63 at HomeDepot (not including the vise). It is a relatively small bench, but due to the MDF top and shelf, it is quite heavy (80 lbs?), which is a good thing when it comes to workbenches as heavy benches stay put when you are pounding or sawing on them. I built this as a general purpose bench, but it would work well for ski tuning.
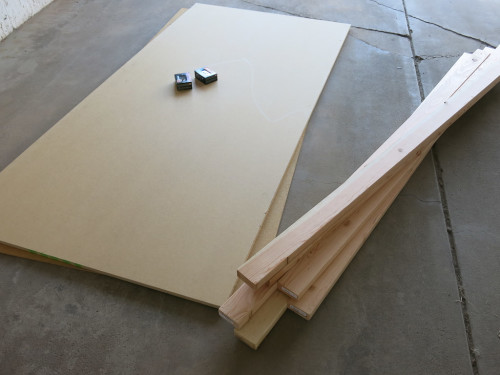
To start, you need four basic items:
- 4 x 8 x 3/4″ sheet of MDF,
- six 2 x 4 x 8′
- 1 box of 3″ gold screws
- 1 box of 1-1/4″ drywall screws
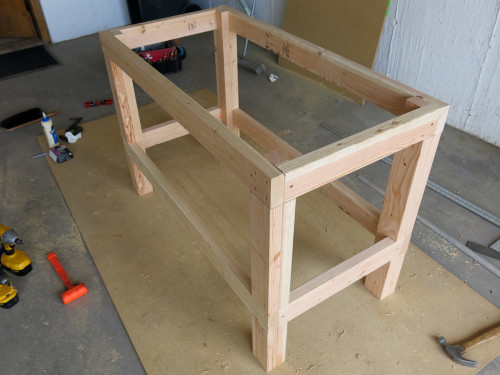
Cut and notch the four main legs.

Glue and screw the 21″ side stringers onto the legs.
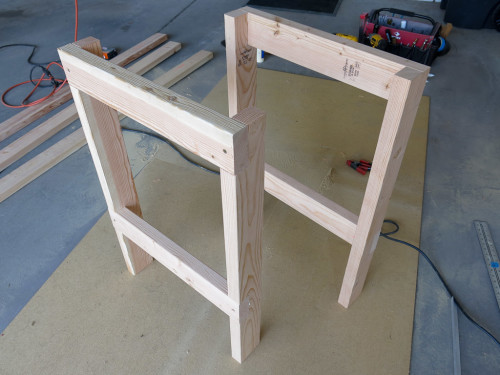
Glue and screw the long stringers.
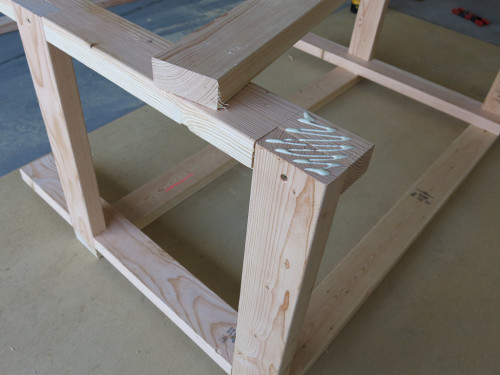
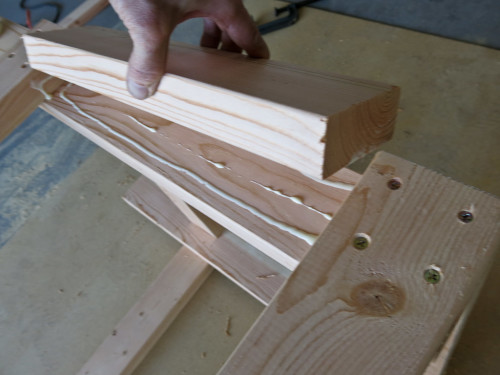
Add in the “filler” blocking to the legs. This essentially creates a 4×4 leg, but without all of the extra notching and/or doweling required. Screw from behind (uhmm, the filler blocks that is).
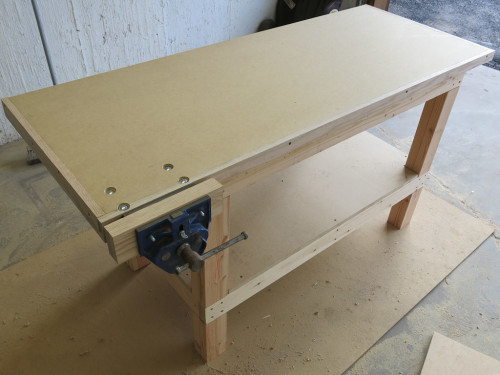
The finished base.
For the top, cut the MDF at 62″ and then cut that piece in half again to create two equally sized 62 x 24.5″ pieces. (MDF is 49″ wide.) Screw the first piece directly to the base with countersunk holes.
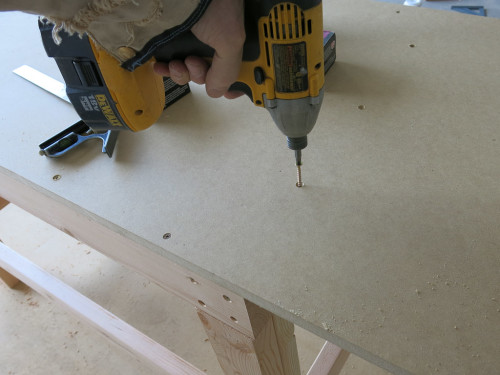
Mount the second piece of MDF on top of the first with about four 1-1/4″ drywall screws from the bottom, then turn the whole bench over and add another dozen or so screws to secure the two sheets together.
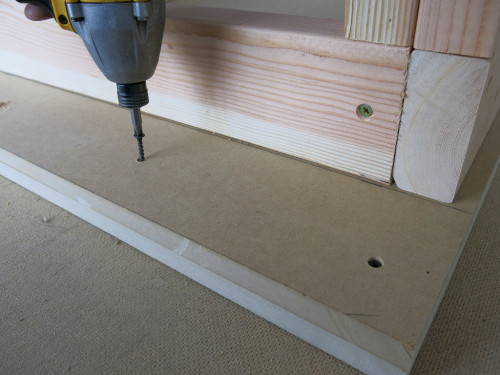
Using your niffy new table, cut out a 24 x 48″ shelf from the remaining MDF and notch the corners to create a lower shelf. Screw it in place.

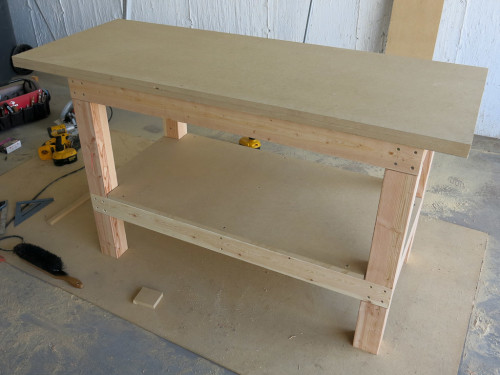
The finished workbench.
Of course, I had to add a few extra details including oak edge trimming (the MDF corners tend to get really beat up) and a nice wood vise which I inherited from my Dad.
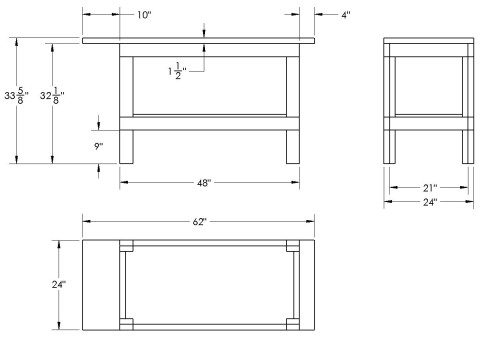
The plans:
Lift with your back, not with your legs… ;)
________________________________
Help support StraightChuter.com and at least look like a carpenter in a Carhartt Logo T-Shirt from Backcountry.com. Click on the photo below.


Category: Projects


Nice design! I’ve made similar, but not with that awesome vise built in. The only thing I change up is using the MDF with white laminate on is in the shelving area at HomeDepot.
The white laminate is a good idea as the unpainted version soaks up spills/stains like a sponge. If I had been thinking, I would have only mounted the vise through the bottom layer of MDF and then put the next layer on top, which would have hidden the carriage bolt heads. Or perhaps mounted the vise with lag screws. Oh well.
I was wondering what, in your opinion, are the best ski vises? Thanks!
Nice! think I might do this with a sheet steel top, (which I have lying around) so I can beat the crap out of it… hurts so good.
Hi Steve – Good question. I’ve been looking around for a new one for the last couple of years and don’t know the answer, although I wish I did! Skis come in so many shapes and widths nowadays that traditional sidewall clamping devices don’t work that well. I use an old Toko vise and then hold the ski down with a short length of accessory cord and a cleat. It still pops loose with heavy filing/scraping, but it works pretty well.
Anyone have an opinion on the Eggbar Vise?
http://www.eggbarvise.com
I use the eggbars at work and there nice although eventuy the rubber wears out. (Although not for a while..) We use those for scraping ptex. For waxing skis we use a regular ski vice with a 4×4 permantly attached to it with some rubber on top of the 4×4 for grip. Since you dont need as much security waxing and scraping wax these work well with any ski.
Hi Andrew,
I was just coming to grips with the fact that I was never going to get around to building a beautiful bench. I just needed to get one built. With a couple of quick hours and a break in the clouds some old 2X6’s from opening up the kitchen is now a bench base.
Thanks for the plans, finding your site was perfect timing.
Cheers,
Pete