Cook Tent Architecture
My first impression of pyramid style tarp tents was not good. After arriving at a barren, windy trailhead late at night, we set the tent up, stripped down and crawled into our sleeping bags. The next thing I knew, I felt a cool breeze on my face could see the stars. Realizing the tent had been cleanly plucked out of the ground by the wind, we proceeded to chase it down in our underwear while stubbing toes on rocks and roots. I wasn’t sold and it took me a few years to see (and feel) the light, but now I’m a convert.
Pyramid style tents (Megamids, Kiva’s, etc.) are an art-form, which once learned, has many advantages. They are incredibly light, spacious, simple and allow you to cook in the tent (not that I don’t anyways). They work well for protection from the sun or rain, and can be used anywhere from the sizzling desert to a freezing glacier. For summer camping, I usually just erect them and leave it at that, but for winter camping, especially if the tent is being used for a cook tent, I’ll excavate bench seats and a table. This process takes anywhere from 30 minutes to an hour depending on the snow quality and urgency, so it works well for extended stays at a basecamp, but is a bit impractical for moving camp every day.
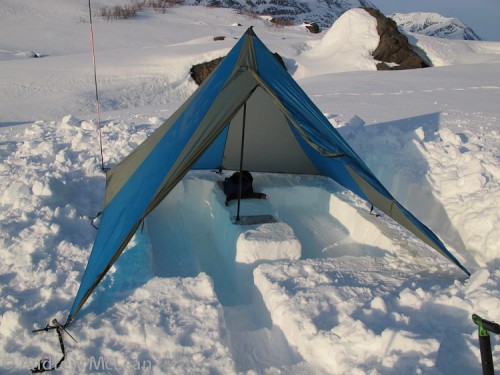
The finished product. This can hold up to about 6 seated people. For added comfort, place a RidgeRest foam pad on the seats.
There are a million variations on this theme, but here’s how I do mine. In the name of furthering the art-form, I’d be happy to post other people’s kitchen arrangements as well. Please send them to amclean@xmission.com.
BEFORE STARTING, ORIENT THE TENT DOOR TO THE LEE OF THE WIND!
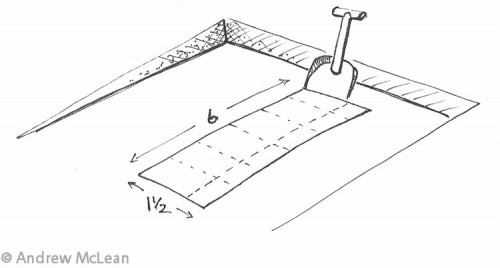
Step One: Level a flat spot (size not too important right now) and then mark out The Holy Ground which will become the table top. Don’t step on this area or dig in it, as it is hard to replace! Mark it off with shovel tic-marks at 1.5 shovel widths wide by 6 widths long.
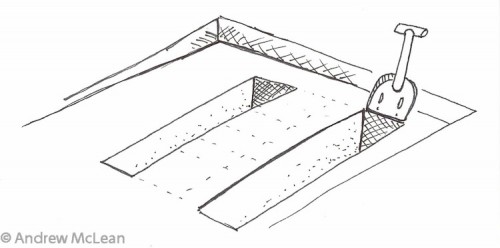
Step Two: Cut out two identical trenches on either side of The Holy Ground. These should be 1 shovel width wide and about waist deep. When finished, these should be big enough to bury a body in, so keep an eye on suspicious partners.
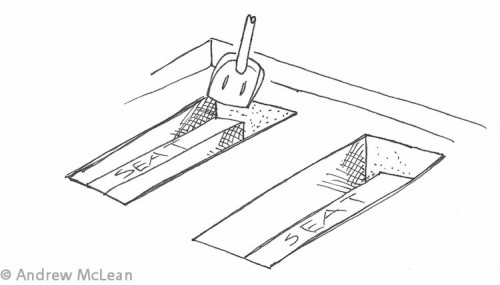
Step Three: Moving laterally one shovel width, dig a half depth trench. This forms the seats. Don’t worry about making these too narrow, as it is easy to widen them later, but not so easy to narrow them.
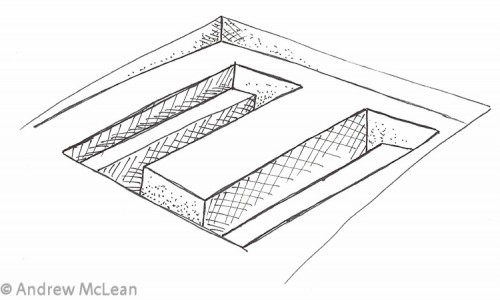
Step Four: Connect the two bays with a trench one shovel width wide.
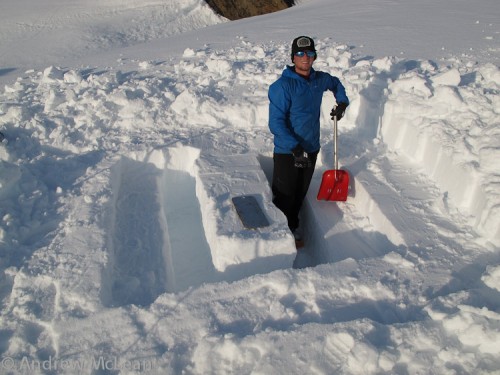
Ta da! Jim Harris basking in the glory of it all.
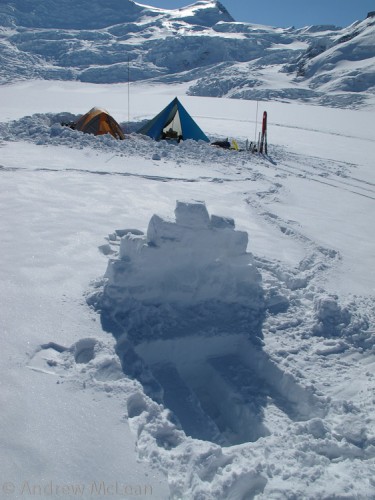
Shitters are just smaller variations on the theme.
After a few days the table will start to melt out and will probably need to be rebuilt. Once the pit has been excavated and the tent erected, cut out a few steps leading down into it. I like to put them off center such that they line up with one of the foot trenches, that way you can keep one side of the tent door closed. Another nicety is to dig out foot/toe wells, although you do so at the risk of structurally weakening your table.
________________________________
Help support StraightChuter.com and bust out a quick kitchen with a G3 AviTECH Shovel ON SALE NOW from Backcountry.com. Click on the photo below…
Category: 02 Gear

